Thursday, January 12, 2012
Aspose.Tasks and Task Types
Task dates may be automatically calculated by the MSP's scheduling engine which may cause a task's start and finish dates to shift depending on the task type setting.
Task task = new Task("Name");
task.Type = TaskType.FixedUnits ;
The following is a very useful post by Chris Woodill explaining each of the TaskTypes:
http://chriswoodill.blogspot.com/2009/03/how-to-use-microsoft-project-task-type.html

Aspose.Tasks in MS Project Resource Uids
When using Aspose.Tasks to generate an XML file for Microsoft Project, if one of the resource’s uid is set to 0 and it has been used on an assignment, the assignment will not be shown once the xml file is opened in Microsoft Project. To prevent this, always set the resource.uid to a positive non zero integer value.
Aspose.Tasks.Resource resource = new Aspose.Tasks.Resource("Name");
resource.Uid = resourceIDCounter++;
Note that a function call to CalcResourceUids of the Aspose.Tasks.Project will reset the Uid value.
_project.CalcResourceUids();
Booking individual periods in TimePhaseData in MS Project using Aspose.Tasks
The following code will allow booking of individual periods in the TimePhaseDetail of MSP.
I've used the following tools/languages for this demo.
- Aspose.Tasks version: 4.0.0.0
- Microsoft Visual Studio 2010 C#
- Microsoft Project 2007
In the example below, all resources are being assigned to each task and are given a 1 or 2 value depending on the flag variable.
foreach (Task task in _tasks.Values) {
foreach (Aspose.Tasks.Resource resource in _resources.Values) {
ResourceAssignment resourceAssignment = new
ResourceAssignment();
foreach (Aspose.Tasks.Resource resource in _resources.Values) {
ResourceAssignment resourceAssignment = new
ResourceAssignment();
resourceAssignment.Task = task;
resourceAssignment.Resource = resource;
resourceAssignment.Start = task.ActualStart;
resourceAssignment.Finish = task.ActualFinish;
resourceAssignment.Units = 1;
resourceAssignment.HasFixedRateUnits = true;
resourceAssignment.LevelingDelayFormat = TimeUnitType.ElapsedHour;
resourceAssignment.Uid = _project.NextResourceAssignmentUid;
resourceAssignment.WorkContour = WorkContourType.Contoured;
DateTime date = task.ActualStart;
if (flag) timephaseData.Value = "PT1H0M0S";
else timephaseData.Value = "PT2H0M0S";
 This is the resource usage view in MSP 2007. Notice that the resource Alien 1 is assigned to all projects with an alternating value.
I needed this requirement in the task I was working on and found that there were no existing examples on how to do it yet so this is just from my research.
bool flag = true;
while (date < task.ActualFinish) {
TimephasedData timephaseData = new TimephasedData();
while (date < task.ActualFinish) {
TimephasedData timephaseData = new TimephasedData();
timephaseData.Start = date;
timephaseData.Unit = TimeUnitType.Hour;
date = date.AddDays(1);
timephaseData.Finish = date;
timephaseData.Uid = _project.ResourceAssignments.Count ;
timephaseData.TimephasedDataType = TimephasedDataType.AssignmentActualWork ;
if (flag) timephaseData.Value = "PT1H0M0S";
else timephaseData.Value = "PT2H0M0S";
flag = !flag;
resourceAssignment.TimephasedData.Add(timephaseData);
}
_project.ResourceAssignments.Add(resourceAssignment);
}
}
 This is the resource usage view in MSP 2007. Notice that the resource Alien 1 is assigned to all projects with an alternating value.
 I needed this requirement in the task I was working on and found that there were no existing examples on how to do it yet so this is just from my research.
Thursday, December 8, 2011
Unit test tips
Automated unit tests provide a safety net to enhance application so that we wont be afraid to make a change without introducing defects and it also makes an application more maintainable.
Unit test names must be robust; They should be named after the functionality that they are testing. A recommended way to name unit tests is to use the Noun+should+verb pattern.
A body of a test method should be arranged using the AAA pattern (arrange, act, assert).
- Arrange: This section contains code that sets up the variables that will be used by the unit test.
- Act : This section execercises the unit under testing and capture the results.
- Assert: This section verifies the results of the unit test against expectations.
Avoid tests that do too much. Verify only a single concept to make it easier to pinpoint the cause of failures.
A good point is to have only a single assert statement in a test method. If you have multiple asserts, make sure that they are verifying the same concept.
Unit testing with a real database brings a number of challenges:
1. It significantly slows down the execution time of unit tests.The longer it takes to run the tests, the less likely you will run them frequently. Ideally you would want unit tests to run in seconds- something you do naturally as compiling the project.
2. It complicates the setup and cleanup logic within the tests. You want each unit test to be isolated and independent of the others with no side effects or dependencies. When working against a real database, you have to be also mindful of state and reset the values between the tests.
To overcome this challenge, it is recommended to use the dependency injection design pattern.
Dependency Injection
Dependencies, like repository classes are no longer implicitly created within the classes that use them. This will allow us to test specific scenarios without requiring a connection to the database.
Thursday, September 22, 2011
Cobra Log Analyzer
The Cobra Log Analyzer is a tool I’ve developed that assists in analyzing xml log files from Cobra.
It can consolidate multiple Cobra xml log files into a single window where it can be viewed, filtered and analyzed.
Opening Log Files
This is the main window for Cobra Log Analyzer.

Click on the open button to open a cobra log file.
Select one or more log files to process and click on Open.
Select one or more log files to process and click on Open.
Files can also be drag and dropped from explorer into the main window.
This works similar to opening a file via the open dialog.
The Cobra Log Analyzer is optimized to open massive log files.
Multiple threads are spawned to quickly process multiple files asycnhronously.
Multiple threads are spawned to quickly process multiple files asycnhronously.
Grouping and Filtering
The information presented in the main grid can be grouped by simply dragging the desired column into the header band.

The visible cells can also be filtered via the filter icon for every column.

Search
Click on the search icon to bring up the search dialog.

The value specified shall be used to search the content column in the grid.
Sunday, September 18, 2011
Concatenating Strings Efficiently
StringBuilders should be reserved when the number of concatenations is unknown or large.
Strings are immutable (not allowed to be changed).
Dim sampleString As String = "I think the vegetables are : " _
sampleString &= "Tasty"
In the above example, the compiler will create a new string, allocate memory, copy the data from the original string and then copying the new data at the end of the existing string.
For a large number of concatenations, this operation is inefficient.
The performance of a concatenation operation for a String or StringBuilder object depends on how often a memory allocation occurs. A string concatenation operation always allocates memory, whereas a StringBuilder concatenation operation only allocates memory if the StringBuilder object buffer is too small to accommodate the new data.
Dim sampleString As String = "I think the vegetables are : " _
& "Tasty"
The string class is preferable if a fixed number of string objects are concatenated. Individual concatenation operations might be optmized by the compiler into a single operation.
Public Function Reproduce(
ByVal source As String,
ByVal iterations As Integer) As String
Dim sampleStringBuilder As New System.Text.StringBuilder()
For index As Integer = 0 To iterations
sampleStringBuilder.Append(source)
Next
Return sampleStringBuilder.ToString()
End Function
A StringBuilder implementation is preferred when a large or unknown number of strings needs to be concatenated.
Resources:
http://www.yoda.arachsys.com/csharp/stringbuilder.html
http://msdn.microsoft.com/en-us/library/system.text.stringbuilder.aspx
Query Engine
The Query Engine is a utility I’ve developed that can connect to and perform queries against SQL Server or Oracle databases.
Connecting to a Data Source
The Query Engine connects to an Oracle or a SQL Server data source via the File->Connect.
This brings up the Data Link properties dialog where connection parameters for either an Oracle or a SQL Server data source may be specified.
The Data Link properties dialog may also be invoked by clicking on the “Connect” icon in the Query Engine toolbar.

Querying Data Objects
Once connected to a database instance, the Query Engine will display all tables found in the specified data source in the table list located at the left.
Double clicking any of these entries will create an SQL select query in the command window and display the corresponding results in the query results grid.

The command window may also be used to specify more advanced SQL Queries.
These queries get executed once the Run command is clicked in the Query menu.
An alternative to this is the F5 button in the keyboard or the Run icon in the toolbar menu.
The Query results are retrieved asynchronously using a background thread.
This operation can be stopped by clicking on the stop icon in the toolbar.
Selecting Columns in Database Objects
Shift Double Clicking on an item in the table list will display the column names that can be selected prior to generating a query in the command window.

The select all button checks all columns for the selected table.
The de-select all button unchecks all columns for the selected table.
The select specified columns will create an SQL select statement which contains all the checked columns in the select columns dialog.
Search values inside Data Objects
Click on the magnifier icon to bring up the search dialog.
The search box accepts an alphanumeric string which is used to evaluate columns of its occurrence.
The search button initiates the search using the specified search string.
The close button closes the search dialog.

The search is asynchronous.
When a search is in progress, the table name and the column where it is found are dumped in the results grid.
Double click on any of the entries in the results grid to issue an automatic query in the command window of the Query Engine form.
This can be done even if a search is currently in progress.
The next button skips the current table and jumps to the next available data object to scan.
There can only be one active search at a time.
The current search needs to be cancelled via the abort button for a new search to be made.
You can also invoke the search dialog via Ctrl+F or via the Tools menu of Query Engine.
Viewing in Card View
Card view allows viewing of records with a large number of columns vertically.

To view records in card view, right click on the grid and then select Card View.

Grouping Records
The Query Engine can group records using a particular column.
This can be enabled via the tools menu.

Once enabled, a band will appear in the grid where columns can be dragged for grouping.

Dragging a column into this band will group the records using that column.

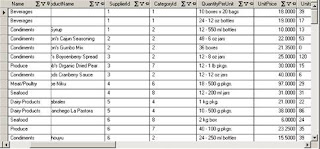
Freezing Columns
A column can be frozen by clicking on the freeze icon. This is the right-most icon beside the column name.
Filtering Rows
Query results can be filtered by specifying the filter condition in a column. To specify a filter condition, click on the filter icon which is the second icon to the right of the column name.

A dropdown appears with a list of choices in which the records may be filtered.
To specify a more complex filter condition, click on the Custom item in the filter dropdown.

Adding Summaries
To add a summary, click on the summary icon for the column that needs to be summarized.
From the dialog, select one or more methods on how to summarize the column.

Clicking the ok button will apply the selection on the column.

Exporting to Excel
To export a query result to excel, click on the Export to excel button in the Query Engine toolbar.
Specify a file name and click on save.
Specify a file name and click on save.

Configuring Query Engine
Clicking on the Tools->Configure menu will bring up the Query Engine configuration screen.

The working directory points to the location that will be used by Query Engine for its processes.
The displayed rows setting controls the maximum rows displayed per query.
This prevents massive datasets from being accidentally loaded to Query Engine.
This can be turned off by specifying a value of 0.
The recommended value is 200,000 rows.
The font setting controls the font that is used for the query editor and the Query Engine grid.
To modify the font, click on the Change button beside the font field.

Clicking Ok will apply the settings to the query editor and the grid.

Subscribe to:
Posts (Atom)